
In this guide I want to show you an easy and fast way to extract audio from YouTube videos.
This tutorial can also be used if you want to download videos from YouTube and save them to your hard drive.
I will also show you how to do this whilst trying to preserve audio and video quality. This is very important if you plan to use these samples in any tracks or DJ mixes.
Plus, this method will work on Windows, Mac, Linux, and Android.
Lastly, this is all done using free and open-source software.
Table of Contents
Why sample YouTube?
YouTube is a great source of samples and video clips. The sheer size and scope of the website make it a superb source for audio and video.
I like using YouTube as a source for my scratch samples. But the method I outline here will work for any musician and producer who needs samples from the site. It will also work for video DJ’s (or VDJs) or those wanting film footage for video effects.
The downside of using YouTube as an audio source is the sound quality is not great. But if all you are doing is using the odd vocal snippet for a scratch, or a vocal sample for a tune, then the poor sound quality shouldn’t matter much.
The other downside: YouTube does not want you downloading video (or audio) which you do not own. So they don’t make it easy for you to capture audio and video.
Why trust this guide
There are many websites and programs around which can download YouTube videos and audio. Some are good and some are bad. But the worst ones come bundled with crapware, malware or they serve malicious ads.
To grab video or audio from YouTube, most downloading tools simpy use the YouTube-dl command-line tool – which is freely available from GitHub. The YouTube downloading apps just provide a wrapper which allows control of the YouTube.dl package without you having to resort to using terminal or windows shell.
There is nothing wrong about this approach. Because the YouTube-dl package is the best tool out for grabbing YouTube videos and audio. It’s free, still actively developed and its open-source.
However, just be wary when using unknown YouTube downloading applications. Because it’s not the way they download YouTube vids which is the problem; but many bad apps sneak undesirable stuff on to your PC during their installation.
And many of YouTube video downloading websites are created just to get banner ads impressions.
But the program I am recommending is clean and it has a great reputation. It is the quickest and easiest way I’ve found to extract audio from YouTube.
The program is still being actively developed, so it should continue to function fore the foreseeable future too. And I have been using the program for over 10+ years and have never had a problem with it.
You might be wondering how I can claim that this software is safe? Good question. Well, the tool we will be using in this guide is open-source.
Meaning, the programs code is freely available for anyone to inspect, change or contribute to.
Because anyone can inspect the code, it is difficult for someone to hide something malicious inside the program.
However, as a precaution, make sure you download the software from official sources only (all the links in this guide link to the software’s official websites).
There are no affiliate links in this guide because I am posting links to FREE software. So, I have nothing to gain if you use the links on this page.
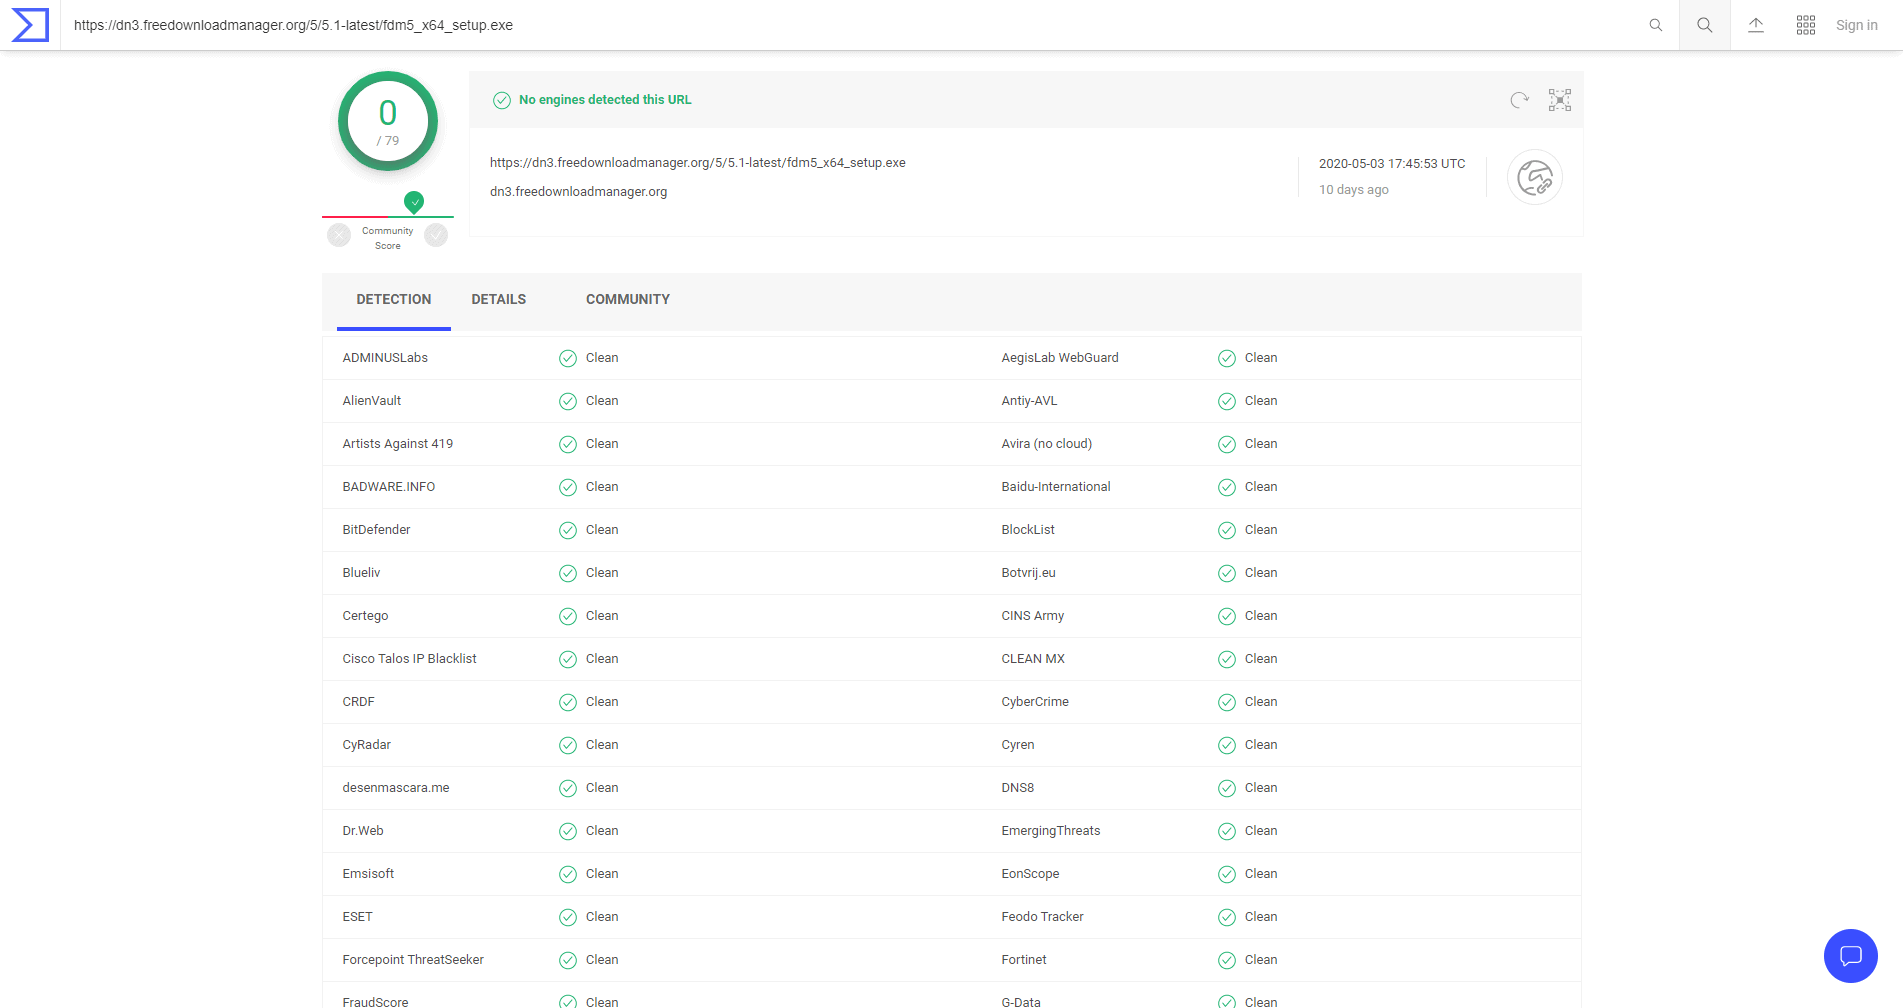
Below is a screenshot of a Virus Total scan of the EXE file – stating the installation file is clean. So, as you can see, the program can be considered safe. Feel free to check this yourself if you’re wary.
Getting started with Free Download Manager
The program we will be using to grab our YouTube audio clips is called ‘Free Download Manager’ (or FDM for short)
FDM also has several other useful features including:
- It can be used as a BitTorrent client.
- It can be used to download videos from other video streaming sites like Vimeo.
- It can be used to schedule and restart downloads (this is handy if you have an unreliable internet connection which frequently suffers disconnects and dropouts).
If you would like to learn more about this program features click here.
How to use Free Download Manager to download YouTube videos and audio
Follow these steps if you want to use FDM to capture YouTube video or audio:
- Go to the FDM site and downloaded the program.
- Once downloaded, install the program.
- Open your browser and find the YouTube video you want to capture the audio from.
- Copy the YouTube URL.
- Open up FDM.
- Click the plus icon in the top left of the programs window.
- In the ‘add download’ window, FDM should automatically detect the YouTube URL in your clipboard and add it to the prompt box. If it doesn’t, just paste your URL into this box.
- Click the ‘download’ or ‘schedule the download’ button.
- The next window allows you to select your download format. And you will have to select the destination where you want to save your file. You can also give the download a specific title. And, most importantly, the ‘Quality’ section at the bottom allows us to select our video or audio quality. I usually pick the M4A audio version as it provides the best audio quality. If you want to capture a video, select the required MP4 format.
- Once done click download.
- After the download has finished, you now have your audio or video files saved to your PC

Editing your M4A file
When I am collecting samples, or creating scratching records, I will only want to use a small section of a full audio download. So, I will always edit any downloaded audio files.
However, I do not like M4A files, as they’re incompatible with some programs I use. So, after downloading audio from YouTube, the first thing I do is to convert any M4A files to Wav files before editing.
For converting audio, my tool of choice is Foobar2000. Below is a video showing you how to convert M4A to Wav using Foobar.
The same process can be used if you want to convert your audio to MP3 (although you will need to install the Lame MP3 libraries beforehand).
Once I have my Wav files, it is simply a case of editing them in an audio editor; culling what I do not need and keeping the useful samples and sounds.
As for audio processing, I usually try to normalise the volumes of the sample I am using. If the sample is dirty and has lots of clicks and pops, I may try to apply some noise reduction or de crackle. But this all depends on the sample I am trying to use and its intended use.
If you need a free audio editor, I recommend Audacity. It is a great tool for editing audio and can even be used for recording DJ mixes.
Hope you enjoyed this little guide. If you have questions or would like to leave feedback, just add a comment below.
Keep on scratching
James (DJ) Kippax